Searching
Want to know the size of your tyres?
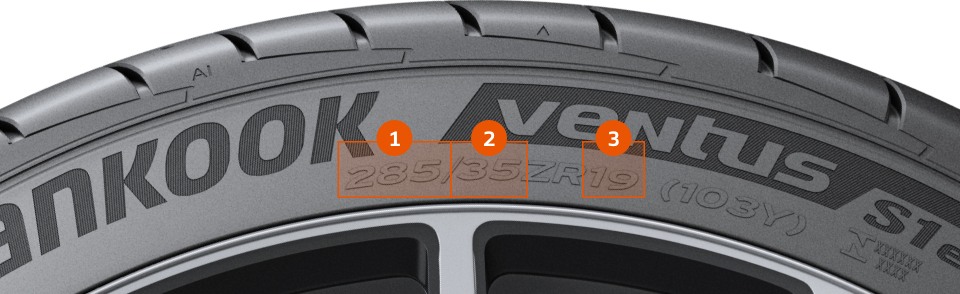
You can find size data on the side of the tyre.
-
1Width285
-
2Aspect ratio35
-
3Rim size19
Searching
Want to know the size of your tyres?
You can find size data on the side of the tyre.